Tag Archives: crafts

When Trash Becomes Treasure, or Supply and Demand

31 May upholstery detail

Its been a while since I put pen to paper (literally). In fact, other than the odd check or weekly supermarket lists, its been years.

It will probably happen with greater frequency over the course of the summer as I sit by the pool, amidst the screams and splashes of joyous kids, while my kids frolic in the water.

I haven’t written a post in quite a while, not because I have been slacking, on the contrary. The pile of unfinished projects in the corner of the studio is growing just as fast as the materials needed to complete them is dwindling, once again proving the point that the value we assign objects is subjective and subject to change at any given moment.

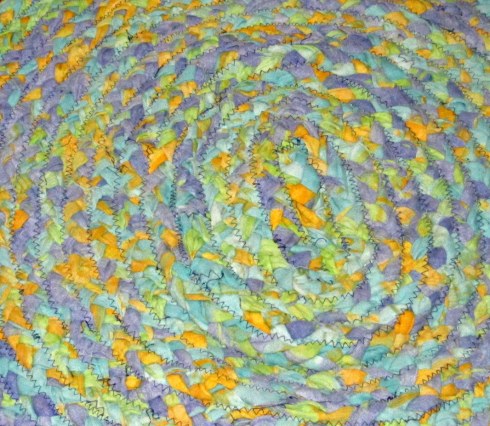
One moment they are shopping bags stuffed listlessly, and guiltily under the sink and in the next they are a valuable material that has been totally used up, every last one pull out of every nook and cranny in the house, and I still find myself about 500 short of completing the carpet. Into the corner goes the half finished carpet and while I wait for the bags to multiply once again and out come the chairs from my old shop that I need to reupholster, and the pile of jeans I intend to use to do so. Once again the amount of jeans I had set aside for the project fell just short of what I needed to complete the fabric for the chairs, and they too joined the pile in the corner.

 upholstery detail

Out came to old, torn, ugly sheets, soon to be place mats and carpets and once again, all to soon they find themselves half finished in the corner.

detail sheet carpet

I have been upcycling quite intensively for just over 6 months now, and something needs to change in the way I am working. I need to find a way to source materials in decent quantities, for free, so that I can work a project, or a series from beginning to end without having to wait till I grow to fat or to thin for my current pairs of jeans. It would be wonderful if all of this could happen for free.

Paper Mache Planter

28 Apr

A long time ago, back in the dark of winter, I wrote a post called How To Make A Paper Mache Light Fitting – Part 1 and never wrote part 2.

Don’t get all excited – I am still not writing part 2, but I have finally found a use for at least one of the paper mache spheres that I made way back when.

If you read this blog with any regularity, you know that since the beginning of spring I have been on a garden kick. I have sown seeds, and will soon be planting a vegetable garden, I have finally fixed some old garden chairs I plucked from a dumpster and I have a 2do list as long as my arm as far as outdoor, spring / summer projects go.

Anyway, I also find myself wading into the studio every time I want to get something or god forbid actually make some work, and something needs to to be done about making some space for me.

I have already gotten rid of all the cardboard I collected to make cardboard furniture – my space is just to small and my kids to curious for me to be doing that right now (that is kind of unfortunate, because now that I don’t have it anymore, I need a big strong piece for the solar oven I need to build but can’t find anything but small and or flimsy). Even so, I still have a pile of unfinished and ‘halfway’ projects, and something needs to be done about it.

Although I was stumped as to how to make the paper mache spheres into light fittings to my liking, I do love the forms, and how imperfect they are.

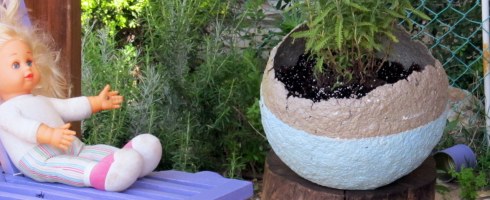
I decided that I would transform one of the larger ones into a planter, and carry on dressing up my front porch, turning it into a pleasant place to have a cup of coffee.


This slideshow requires JavaScript.

I had a lavender plant looking for a home and I thought it was the perfect combination.

I didn’t want to paint the sphere in just one block of color – I wanted to experiment and create some more interest so before priming it, I taped a line of masking tape around it and primed and painted only bellow that line.

Since the chairs are definitely present in their bright purple, the sphere needed to be a quieter color. I mixed a quiet bluish gray that complimented it and would also compliment the lavender plant.

I gave it 3 layers of polyurethane to water proof it, so that it wouldn’t melt into a pile of mush leaving the lavender homeless once again.

Just before I planted the lavender I decided to do a little test run to see what would have happened if I had decided to use it as a light shade. In the background you can see a fitting I made out of plastic cups which I never posted about here.

So what do you think – does it work as a light fitting?

Finding My Doodle – Doodled Tuna Coat Hangers

26 Feb

I have been reading a lot about cardboard furniture, and fantasizing about industrializing the whole process, without even making the tiniest piece of furniture. Not for the lack of trying – I am collecting boxes from here and there,  and am finding flaws in the boxes which make them unsuitable for what I want to make. It’s a bit frustrating, and I am sure there is an element of procrastination, do to the fact that I am really quite scared of trying and failing with this.

In the meantime, I am tuna canning again.

This slideshow requires JavaScript.

I have always been a doodle freak, except in the past few years, when the jewelry took over every available grey cell in my brain, and even my doodles were jewelry oriented.

Parallel to writing this blog, I have started a new sketch book, dedicated to finding my doodle again, and it is coming back slowly but surely.

In addition to that, I am enjoying my tuna can coat hooks, and want to make more of them, both because I could use more elsewhere in the house, and also because they would make nice gifts.

Anyway, it seemed like a good time to combine both these activities and I have started doing a series of doodled tuna cans. I did the initial black with an Artline marker, and was going to color it with acrylics, but discovered its harder than it seems, mainly, since I didn’t have a tiny enough brush. Even though I did give one of my brushes a hair cut, it wasn’t as accurate as I needed it to be, and as you can see, I needed to wear my optivisors, a serious throw back to my jewelry days, to be able to hi the right spot with the brush.

I have since purchased a good one, I hope, but have not put it to use yet, instead, I decided I would try the easy way out, and color in with markers.

Although I do like the results, I realize how limited the markers color palate is, and although it’s hard for me to imagine life getting any better than being able to do my art in bed, I will, at least temporarily abandon the markers in favor of my new brush and acrylic paints.

Any tricks for painting tiny areas accurately?

How To Make a Paper Shell Chandelier

14 Feb

fauz capiz shell chandelier

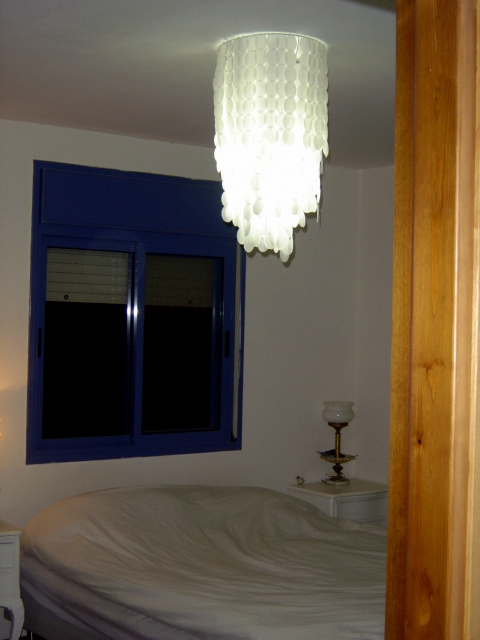
If you have been following me, you know that on my 2012 list of things to make I have several light fittings, since we don’t have any at all in our house. I have started a couple out of paper mache, and have left them for a bit to think about how I want to proceed. I have a few other ideas running around in my head, one of them Is this faux capiz shell chandelier, and chances are the first blog to feature them was Design sponge. These seem remarkable simple to make, so simple its nearly silly, and I marked it in my head as something that would look great in our bedroom.

For the base you can use an old lamp shade or planter basket (which is what I did) and the shells are made of several layers of wax paper, ironed together.


I used ovals instead of circles, and initially tried adding some glitter in between the layers of wax paper, but decided to pass on that since it prevented the wax paper from adhering properly.

 Although, as I said before, this is so simple it’s nearly silly, I still managed to get myself into all sorts of trouble, mainly by neglecting to see how far the end of bulb was from the ceiling, only to discover that “not far enough” was a pretty accurate description…. I only found this out while single handedly attempting to hang it from my ceiling. I ended up having to cut out the center of the basket, to allow the bulb to hang through, but now might just have a fire hazard on my hands since it is really close to the paper. I will probably shop for some kind of hardware that will allow the light to sit right on the ceiling, thus avoid burning my house down.

 Other than that, I am quite pleased with it. It softens my bedroom up nicely, and is much nicer to wake up to in the morning than a bare bulb.


There are several ways these can be made, and it worth while searching a bit and choosing the way that suits you best.

 This is what I did:

  •  I started of by ironing 4 layers of wax paper together. I sandwiched them in between parchment paper, to keep the iron clean.   (I did this many times, maybe 50)

  • Using a stencil oval cutter, I cut out 1000 ovals (yeah, I know….) out of which I ended up using probably about 950.  To minimize the work, try and see how many pages you can cut through at once. I found that 3 was fine, four was pushing it, so for most of the time I cut in piles of 3 (after it occurred to me that it’s insane to cut each oval on its own).


  • A lot of people use hot glue to make the strips of circles/ovals. I am not a glue fan so chose to sew the strips. I made sure to overlap the ovals a bit, except between the two first ovals, where I left a tiny space. When attaching the strip to the basket, I just folded that little space over the basket wire, so that I have one oval on the inner side of the basket. I attaché the thread to the basket wire with a bead of hot glue.


  • When you sew or glue your strips together, start by counting out your ovals/circles into groups. I used a muffin tin (two, in fact). It streamlines the work.


  • Use the longest stitch on the sewing machine. To avoid tearing the paper.


  • Work from the inside out. It’s a good Idea to sew or connect your strips for the first tier, and figure out how long you want the next row to be. My inner circle has 11 ovals on each strip (one folded over), then 2 rows of 8 and one row of 6.
  •  While working on it, I had it suspended between the backs of two chairs.
  •  I attached mine to the ceiling with two small hooks.

Now, other than the chandelier, I have a pile of thick wax paper sandwiches with oval cutouts. I wonder what I can do with them? Any Ideas?

The Perfect Solution For Lost Socks – Crochet Lost Socks Basket!

1 Feb

Have you ever wondered where all the lost socks go? I know that I am not the only one who keeps on buying new socks because in some mysterious way, I always end up with a bunch of non related socks.

It’s not as if I was raised or am raising my family to leave one sock outside and throw the other one into the laundry hamper. It’s as if there are casualties if not fatalities in the journey of the socks from our dirty feet to the clean sock draw. I would say that about 40% of the socks never make it back. They just vanish into thin air. Maybe they are kidnapped by a monstrous sock napper that lives in the laundry hamper or  maybe they are munched up by a ravenous washing machine or ripped of the clothes line by a stealth sock ripper. Who knows. What ever the case is, their sock spouses need a place to wait hopelessly for them to return from wherever it is they disappeared to, because sometimes they do.

 To this purpose, I decided to make a lost sock basket, in which all the lone socks would gather and save us the trouble of digging through piles of single socks in the hopes of finding a pair.

 Since I am enjoying the look and the texture of the crochet baskets from plastic bags I decided that this was the route I would take for the lone socks basket, but I wanted to explore other patterns than the one I have been using.

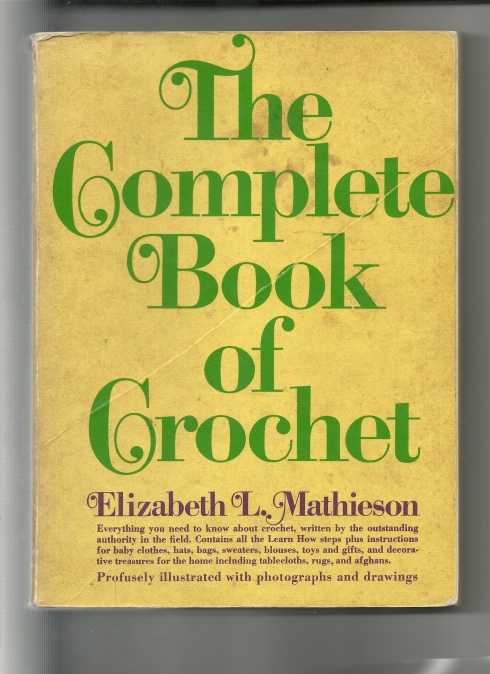
 The complete book of crochet

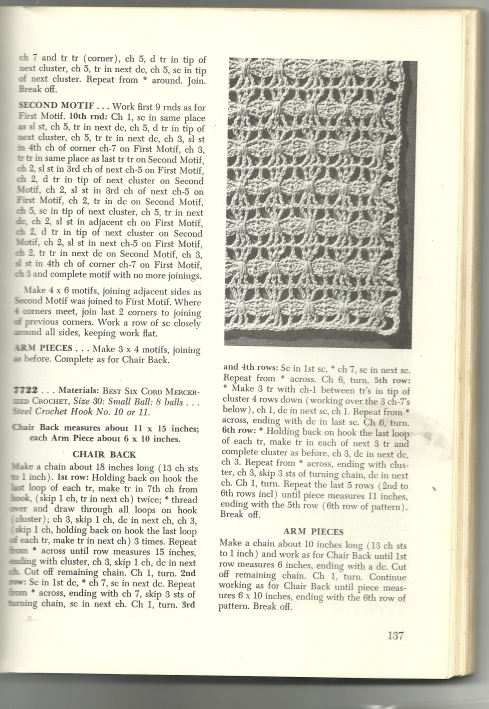
I have an old book that used to belong to my mother called The Complete Book Of Crochet and  it is copyright 1946 and the edition I have is from 1972. I was 5 years old when my mother bought this. She made quite a few things out of it, and I remember this book as always being around. It seems appropriate to me that now that my own daughter is 5 years old I use some of the patterns in it. As a matter of fact, I have had it for the past couple of years, and have been dying to make something, but doilies and crochet table clothes, as beautiful as they are seem kind of dated to me. Taking one of the patterns and using it with the much coarser plarn, instead of with delicate, thin cotton seemed the thing to do.

chair back 7722

I am not going to copy the entire pattern here, but you can see it on the scan (its # 7722. If you click on the image it will open much larger).

I adapted it to the size I wanted since I was working with a different size plarn than the weight it was originally planned for, the important thing is the sequence of the different crochet stitches. Since I do most of this in the evening, after I have finished all the other things I have to do, my concentration is less than optimal, and I found that I had to pull out just about as much as I crocheted.


For some reason I was surprised with the result was a bit floppy. I am not sure why because it is quite big so it makes sense that it would be. I solved that easily enough with wooden Skewer in all 4 corners. If I wanted it to be a magazine basket instead of a sock basket, I could strengthen the top with skewers too.

Now I want an Idea for something I could make out of a traditional doily pattern. Any thoughts?

How To Make a Coat Rack from Tin Cans

15 Jan

I finished them, or kind of did LOL.

Tin can coat hooks

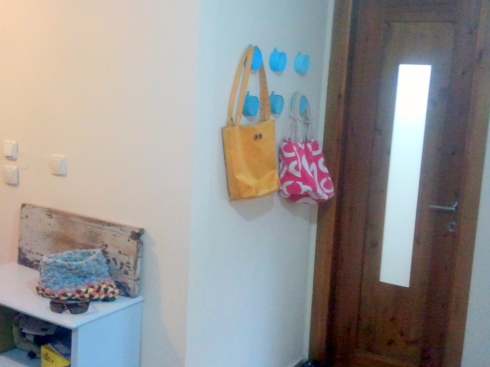
It was quick, light and fun as anticipated, and I would have been able to say that I finished them completely if I was happy with the colors, and had the hardware for the wall… (I don’t know what it’s called in English, neither does Google translator….the little plastic thing you insert into the hole in the wall, into which you can screw a screw….)

BTW, the reason they have light canvas totes hanging from them instead of heavy leather coats is because they are secured to the wall with blue tac at this point in time. It was quite amusing trying to get the bags to stay up long enough for me to walk the 2 steps back to photograph them….

I wanted them to be gradated shades of light blue or light blue/gray. Color is not something I do often so getting the colors to look exactly like I wanted them, with the subtle differences you would see on paint chips has proved harder than I expected. Being disappointed with the blues I thought that it would be more subtle in shades of cream….Not quite sure yet.

Anyway, the good thing is that Tuna cans are not hard to come by, and this isn’t a time consuming project which means I can be as indecisive as I want to….!

Of course you can treat these as a blank canvas, dolling them up or keeping them as plain as you want. I love the clean industrial look the bottom of the cans have, which is why I decided only to use color.

I have put together a short tutorial for your benefit:

You will need:

Tuna can/cans

Metal snipers,

Drill or nail (to be used as a punch) and hammer

Flat nose pliers, preferably toothless so you don’t scar the metal

Primer

Paint

Polyurethane to finish.

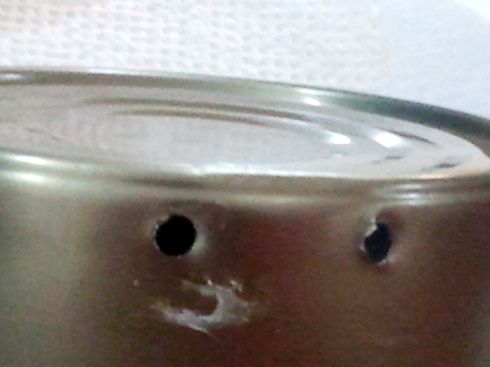
Drill 2 holes right near to the bottom of the can, about 1.5 – 2 cm apart. (more or less o.6 – o.85 inches)

Starter holes In Tin Can

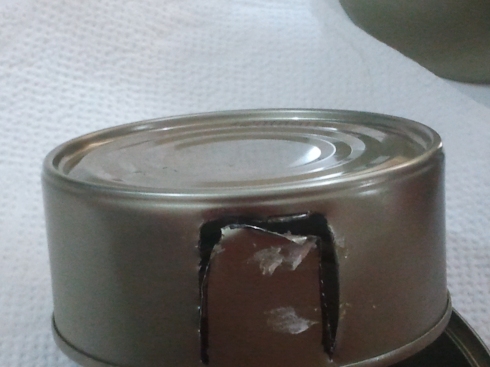
Cut with metal snips between the two holes and then down to the bottom of the can. It helps to mark the lines before hand, since you snips will pull you sideways.

preparting tab

Pull the tongue out towards you and fold the edges towards the inner side. (I like the fold to be visible. If you would like the fold to be invisible, then fold the edges towards the outside of the can).

Push the tongue inwards till it is perpendicular to the can and fold the edges on the can itself inwards. The folding makes things look a bit tidier, and also helps you avoid cutting yourself or ripping your coats. This is a bit more complicated to do since you need to find a way to grab the edges of the can with your pliers from the inside…It is doable with a bit of patients.

Finish folding the tongue so that when placed on the table, the opening of the can and the tongue are flat.

Drill a hole in the tongue big enough for a screw.

Paint with primer and get creative with paints. It’s a good Idea to finish it off with poly since coats and bags might be rough on the paint and vs. versa.

Enjoy!

Whoohoo….

12 Jan

Remember my List?

Combine that with the fact that on the same day I wrote the list my coat hanger rack, or one of them, magically fell of the wall in the laundry room. It kind of felt as if the powers that be were trying to give me a big fat hint as to what item on my list would be a good place to start……

 mystery hook

This coat spent the whole night hanging on my new trial coat hanger…..it  is just a sketch to see if it would work, and guess what – It does.

 Of course, like the rest of the things I am making, it will take time before I can actually show you the finished product, all nicely gussied up for guests and for show and tell, and I am wondering if I should leave this as a cliff hanger to get you to check back soon, or if I should go with my instinct an my inability to keep my mouth shut and show you this:

Tadaaa!

I am really excited about this, and have a whole master plan R hasn’t heard of yet…. (Although he did giggle in delight when I showed it to him yesterday) he tends to get stressed by the thought of old cans hung on our walls in plain view…..

‘Nuff said!

How To Make A Paper Mache Light Fitting – Part 1

1 Jan

Today, as I was rushing out the door to pick up the kids, I caught a glimpse of my studio and this is what I saw:


It filled me with joy. It’s not as if I have actually finished a piece or that there is anything to show off, but is its quite clear that in this tiny tiny room, work is being done.

What you can’t see here is the piles that are all over the place.

There are piles of newspaper, of plastic bags and of half ready materials. A lot of my time is spending moving piles from one spot to another, but that is not what I wanted to talk about today.

Today I wanted to talk about Paper Mache.

I think I have already mentioned that one of the things that bothers me most about my house, is that I don’t have a single light fitting in the entire house. All we have is bare light bulbs.

The bareness of the light bulbs makes this house feel very temporary. It has reached the point that any material is, as far as I am concerned, a potential light fitting.

A while ago, while surfing the net I ran into some instruction for making light fittings out of Paper Mache pulp using beach balls as a mold. The instructions where removed so I can’t link to them, and since I had a Paper Mache outbreak a couple of years ago,  although I am no specialist, I was able to figure it out without the instructions.

I made the pulp out of the newspaper sticks I had disqualified, and the first batch was exactly enough for one big beach ball.

Newspaper Soup

Newspaper soup

Making the pulp is a pretty easy:

 Cut/tear newspaper into small pieces and soak in water over night.

  1. Boil the newspapers for about half an hour, when you are ready to start working.
  2. Pour out the dirty water, exchanging it with clean water.
  3. Pull out the blender, and start blending the newspaper with large quantities of water.
  4. Strain the blended pulp, squeezing out as much water as possible.
  5. Add glue to the strained pulp. I use wallpaper glue, but there are a few variations to the glue. It’s a matter of personal preference.
  6. Kneed the glue into the pulp till it’s velvety and nice to touch.


I have big eyes, and of course I wouldn’t settle for the small beach balls I had bought. After I inflated one, it seemed to small, so I rushed out to by a regular size beach ball. It seems as if beach balls are the kind of thing that is found in abundance when not needed. When you need one, it’s a whole different story.

Anyway, starting with the big ball was a mistake. I am not sure if the consistency of the pulp was off, or if the thickness of the layer I was using was to blame to, but the big one is the only one out of the three that I have made so far that hasn’t come out near perfect. It cracked and warped all over.


The other two smaller balls were made from another batch of pulp I made, which makes me think it might be the amount of glue that I used on the big one was to blame.

Anyway, I think that both the big ball and the little balls have a  certain coolness to them.

I have always liked to watch as materials changed and mutated as they were worked with. This is seven fold as wonderful when you transform a product into material and then into a different product again.

Although I am quite please with my balls (that doesn’t sound good) I am not going to hang them with their current grayness in my house.

 I am going to make a few more of them and test several finishes out, till I find one that wins me over enough for me to hang a fitting with that finish over my dinning room table.
To be continued.

8 fantastic recycled design projects in less than one minute each

29 Dec

Every now and then, maybe once a week, maybe less, I will be posting some of the inspiration I find in all sorts of corners on line.I This video had me smiling the whole way through, so I thought I would share it with you.

it would probably take more than 1 minute to make each but who’s counting?
via craftzine

How To Twine A Placemat Out Of Newpaper, Even If You Have Never Done It Before

26 Dec

It seems as if I am back in the swing of things. A couple of days ago I finished what seems to be my first “placemat”. The inverted comers are there because it doesn’t look like a place mat I would use, and might still be in the realm of classroom crafts. When I complained to R about it he said “well, what do you expect, its not as if you were born twining, learning new things takes time” and I guess he was right.

Learning new skills and techniques take time. This is my second attempt at twining with newspapers, or twining in general. Last time I tried, I found out how important it was for the newspaper sticks to be totally straight. I also thought it would be better to start twining in the middle of the piece by folding a stick in half an alternately going to the left and then to the right.

I think this could be used to create interesting textures, if you alternate the spoke you start on, potentially zigzagging across the piece making interesting textures. I might try that somewhere down the road.

The next piece I try I will work from one end to the other and see if I can make everything square out a bit more.

Even though I measured equal distances for my stakes, somehow, while working,  they didn’t stay parallel, especially the external ones, and I started getting a  trapeze shaped piece instead of a rectangular one.

This would usually be enough to send me running away, screaming and pulling my hair out, but as R said, learning is a process, and funky shaped pieces is part of that.

 After I saw things were getting a bit out of shape I decided to do a “keeper line”, kind of a boarder that would go around my piece and catch the ends of the twining at the end of each row. In that way, I thought, I could also stop the stakes from moving sideways and widening the trapeze. It did help a bit.

One think is for sure, on the next piece I make, I will make sure to slide my ruler down as I work and keep squaring out the distances between the stakes. Wobbly and crooked is ok if that is what you want, but it wasn’t what I wanted at all in this case.

Finishing the piece is something I haven’t quite worked out yet.  I weaved the stakes back into the plastic I twined around, and it doesn’t look to bad. If there wasn’t a color difference, then it would have been perfect. I am not too happy with then ends of the cross twines.

All I did was chop them off at the ends, after twinning them together with the yellow plastic bags. I thought that the best thing to do in this case would be to sew on a heavy fabric boarder. I will try that in the future, but currently lack both a working sewing machine and heavy fabric.

 I still have to try and coat it with polyurethane to waterproof it, something I am not looking forward to.

 If anyone has any experience with this technique I would love to get some pointers!